Alright, I’m a bit late, it’s been a long weekend.
First I want to talk about some updates to my timeline, followed by some test model pictures and thoughts, and then finally touching on the submission model and how it’s coming along. Let’s dive in!
First off, my aggressive schedule has been relaxed, as my real world house plans have been pushed back a few months. With this lax I did the only reasonable thing, I procrastinated… I kid, the weekend ended up being a lot more busy than I thought it would and I did not get in my 6 hours of painting. That being said, last week was super productive and on schedule. So I feel good about where I am even if timelines have been shifted.
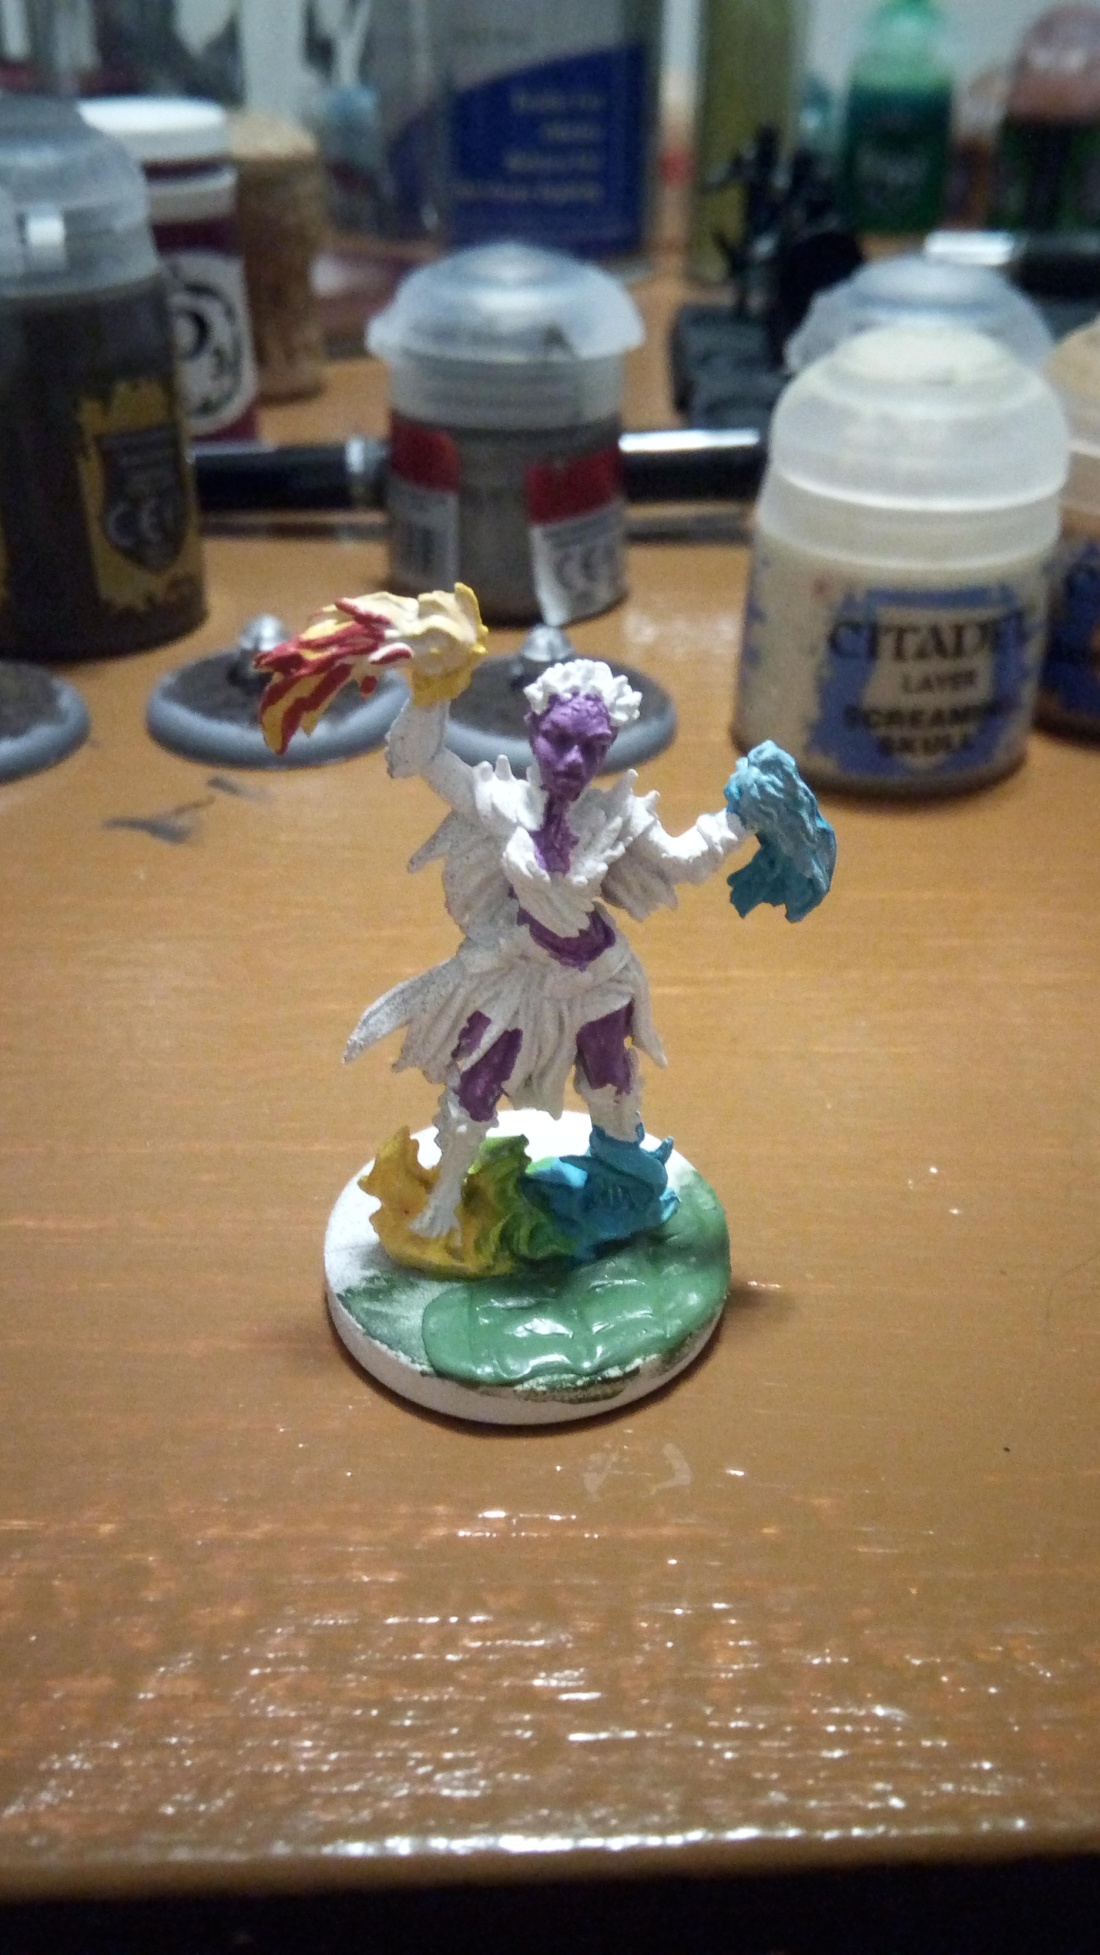
Now lets take a look at the Spellweaver I started with:
And the supplies that I used:


First up was cleaning off the old paint job. To do this I covered it up using 2 layers of the Ceramite White. I however forgot to grab a picture of the model at this step :(. Afterwards I setup my required paints by taking a dab or two out of the pot and mixing it with some of the Golden Retarder (in ~2:1.) With all my paints set up and armed with Sorastro’s painting guide I started to work. Since I only wanted to practice red flames I decided to practice both of the hand fireballs in red, rather than red and blue. I also wanted my results to come out brighter, so my results used more orange and red than his.


In the end this is exactly what I wanted, an imperfect result that taught me a lot. Red is super strong, and even with using less of it than the orange it was overpowering. Similarly the white is overpowered by everything. Given how well the white was able to layer over the last paint job this was surprising.
Looking at this now I’m not super happy with both how much red came through in the final results, as well as how little the yellow and orange are separated. Something that I was doing here that I wouldn’t think about for a few days was that I painted both sides of the hand at the same time. So my session was broken up into painting the left hand and then the right. I wish I had taken more time to paint the front and backs independently as well, but this is how I learn.
Before I jump into the Thursday update I wanted to add in how my pallet and water cup looked:


It was a very different way of painting and one that took a lot of pallet space. It’s easy to see the larger pools of paint I started with for my mixtures, and then how they spread out in trying to get smaller amounts on my brush. I found in the beginning I was taking long times with each color getting it on the model, and later on it was grabbing small amounts to update rather than color.
Let’s take a look at the Thursday update with the lower flame:


It’s easy to see how I started to correct the amount of red I was using, but still didn’t end up with fully distinct yellows and oranges. It’s also funny that I like this much more now than I did when I was painting it.
I applied WAY more paint than I needed to, it ended up with huge pools of paint that were difficult to work with. It felt like I had done everything the same as the nights before, but came out much more sloppy. Wet blending on a shorter narrower surface is a lot harder than a long one. You get less room to “store” paint on the model and less space to blend in. A valuable lesson for later btw. I attribute like this outcome to luck rather than skill, but it’s still a win for the lessons it taught.
Alright so how’ed I do with Shang? After doing the research, the planning and the preping I must have gotten a great start on them right?
Well not quite….
After writing out the last post, 2 things happened:
- I saw a lot of other folks talking on A Wyrd Place about doing Shang. While I don’t think this is directly a bad thing, I don’t want to just be compared to them, and
- I remembered I had another model that needed painting that I can use, Sue!
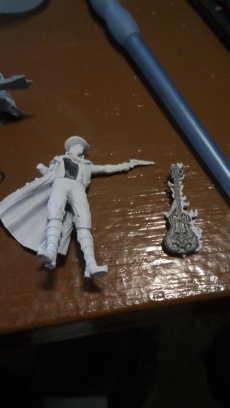
I got Sue put together and primed while I was working on the Spellweaver. and started to paint the guitar before I remembered to take a picture, Doh! But surely I got more done with him over the weekend, right?
I did! I was able to work with some of the guitars fire, which is both shorter and more narrow than the Spellweavers base, glad I practiced that.
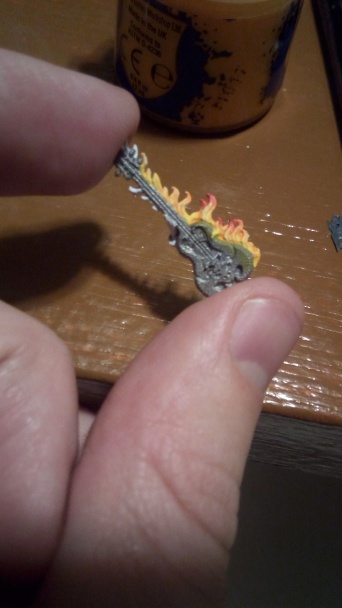
And I couldn’t be happier with what I got! I learned to only paint part of it at a time (front only, no back yet) I toned the red way down, only using it on the highest peaks, not all over, since the space is so limited I cut white out entirely, and I used a lot less paint overall. It’s not perfect but I’m stoked!
I tried to make a glaze from the yellow to apply to the guitar but that didn’t work out, and I really need to highlight it anyways first, so I’ll go back and try something else after touching up, and this process is taking me a lot longer that the previous tests. This one side took ~1.5 hours as opposed to 2 hours for both hands. Time and patience go a long way in this hobby, and measuring your results only proves it.
This week my new goal is to finish up the guitar and focus on the man in black on the weekend, I’ll be doing my best to attempt object source lighting for the first time so wish me luck!
